Using Teamcity and the Anka Build Cloud
Teamcity is a popular CI/CD tool that can be used to build and test software projects. The Anka Build Cloud can be used to run builds and tests in a cloud environment, and it can be integrated with Teamcity to provide a complete CI/CD solution needing ephemeral macOS VMs/containers.
The Anka Teamcity plugin allows you to communicate with your Anka Build Cloud Controller to create, manage, and delete VMs/containers on demand. You’ll create a Cloud Profile in Teamcity to define your Controller, VM Template, Tag, and other options. Once defined, you can assign that Cloud Profile to an Agent Pool, or keep it in the default pool.
VM Template & Tag Requirements
IMPORTANT: As of 1.9.0, our plugin will install the Teamcity Build Agent for you into the VM Template/Tag under the path specified in your Cloud Profile.
- In the VM, install the proper JRE/JAVA version. We recommend Zulu. As of plugin 1.9.0, you will need Java 17 or higher.
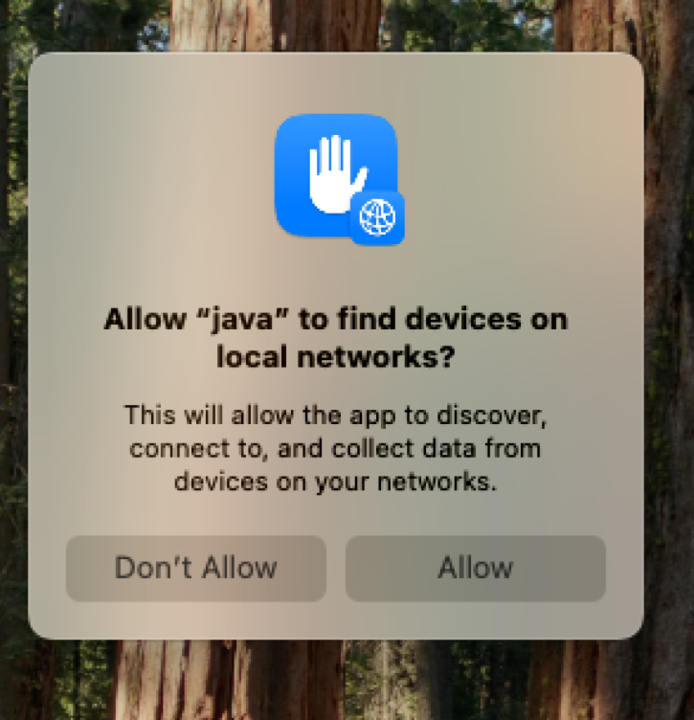
- In the VM, you’ll need to ensure that java has access to the “local network” if you’re using macOS 15.x or above in the VM. You’ll see the image below otherwise and the buildAgent won’t be able to connect fully as an instance to teamcity. To do this, temporarily install the buildAgent into the VM with VNC, connect it to teamcity, and then click Allow on the dialogue you see. Then delete the buildAgent folder from the VM as our plugin automatically installs it.
- If using Shared Networking mode: In the VM Template, make sure remote login is enabled (
System Preferences > Sharing). On the host, enable SSH port forwarding for your VM Template using the Anka CLI:sudo anka modify <VM Template name> add port --guest-port 22 ssh. We recommend not specifying –host-port.
Usage
- Download the latest plugin zip..
- Upload it to your Teamcity.
- Edit your project and under Cloud Profiles add a new Profile and configure it as follows:
- The Server URL may look populated, but it will not work unless you manually type in the proper URL for your teamcity. This is the URL for your teamcity that’s accessible from inside of the VM.
- Choose the template you created for Teamcity and specify any other required fields.
- Agent Path should be set to the agent root directory, not a folder inside of it like bin, etc.
- Run your job and then watch the Controller’s Instances page to ensure an instance is starting.
- As of 1.9.0, Teamcity needs to start a VM “Agent” to collect information about capabilities. Your job may say “There are no idle compatible agents which can run this build” until the first VM is ran and capabilities are collected.
Be sure to review our troubleshooting guides for Teamcity should you have any problems.
Release Notes
Found at https://github.com/veertuinc/teamcity-anka-cloud/releases.